
We are in 2022, and people still ask questions like, “Is it possible to earn money online via blogging?”
Obviously, it is possible if you have the will to learn “How to make a creative blog and utilize a platform like AdSense with it.”
Sounds too vague as a beginner?
Do not worry!
I am here today to help you out in two aspects, i.e., “How to get started with blogging from scratch in 2021?” and “How to monetize your blog via AdSense?”
Using practical strategies and real-time examples, I will try my level best to help you get started with earning extra money from blogging.
In return, you will have to promise me to practice each step I mention with proper focus.
Ready?
Let us start, without any further ado:
Blogging Guide: How to Get Started (Step-by-Step)
Creating a blog is not as difficult as you might think.
I mean, you have to choose a name for your blog, acquire a domain and hosting for it, and install WordPress on it to get started.
However, if you do not understand the basic concepts of how blogging works, it will become difficult for you to grab the attention of your audience.
The end result? You will not earn a penny if no one visits your blog.
Follow this step-by-step guide if you do not intend to follow people who have failed big time in blogging.
Step 1: Brainstorm the Ideas for Your Blog
There is a pillar idea behind every blog and that is how you should start this journey.
The main thing here to discuss is that your blog should revolve around something specific, especially if you are starting from scratch.
Now, I am not saying that the idea should be brilliant or extremely unique.
However, you must have some experience or interest in the ideas you bring to the table.
The two most important questions you should ask yourself before deciding on the main idea of the blog are:
- Do you enjoy learning about the topic?
- Are others interested in it as well?
Let’s discuss these two questions in detail now.
1) Do You Enjoy Learning About the Topic?
Many professionals say “You should start with the idea that interests you.”
In short, you must be excited enough to learn more about a specific topic.
It will not only improve your research skills, but you could easily interest your audience and compel them to read your blog.
If you do not love the idea, simply avoid it, especially when you are starting as a beginner.
Let me give you an example:
I, for one, am an avid football/soccer fan and I love Real Madrid. I have insights on this team, its players, its schedule, and other relevant information.
If I am to create a blog in 2021, I will go with something specific about Real Madrid as I love the team and would like to know more about it.
That is how blogging works in 2021.
2) Are Others Interested in the Same Idea?
Getting specific about the blog idea will help increase the visibility of your content and you will be able to attract many users this way.
For instance, if I search the term “Real Madrid” on Google, it will become too broad.
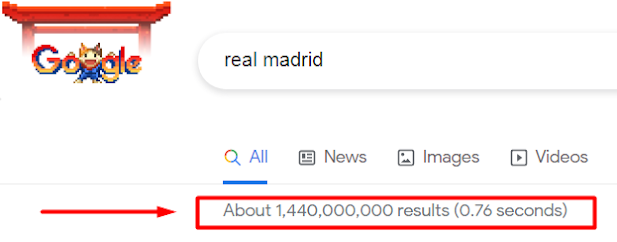
On the contrary, if I choose to be more specific, that is, by typing “Real Madrid News” in the search, the search results will lower down:
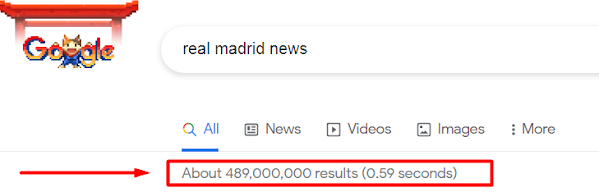
This way, I would know that my competition has lowered and I have a good chance to grab a potential audience for my blog.
Step 2: Decide on the Name of Your New Blog (Blogging Guide)
The most fun part of creating a blog is choosing its name.
It does not, however, mean that you can choose whatever comes to your mind.
Always know that your blog is your brand. The shorter its name, the easier it gets for the audience to remember it.
While keeping these things in mind, you should not make the name-choosing process too complex.
The best way to decide on a blog name is to brainstorm words related to your main idea and note them down no matter how absurd they feel.
You can either use a pen or paper to jot down different names that come to your mind or use an extra excel spreadsheet as per your preferences.
Just make sure that the name you choose is a little bit relevant to what you will post on your blog.
Brainstorm at least 5 to 10 different names related to your blog and then note them down for the next step.
After you note down all the names, it is time to check whether they are available as a domain or not.
New to the word “domain”?
Well, domain means the virtual address leading to your blog.
For example, “facebook.com” is a domain that will lead you to the World’s leading social media site, i.e., Facebook.
Similarly, “realmadrid.com” domain will open up the official Real Madrid website where you can get to know about it more thoroughly.
To check whether the name you have chosen is available as a domain or not, you can utilize different websites.
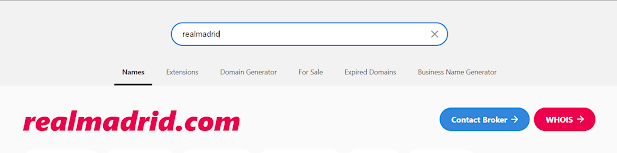
The one I suggest is Instant Domain Search. Open it and type the name of your blog in it to see whether the domain is available or not.
If the name you type turns red on this website, it means you cannot acquire this domain. For example:
If the name you type turns green, then you can acquire that domain for your blog while spending a few bucks. Take a look:
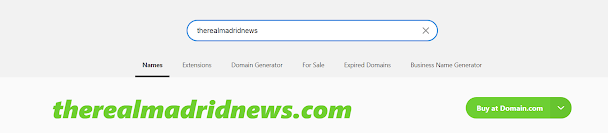
This way, you can check the name you have chosen within a few seconds. The best thing about Instant Domain Search is that it gives hundreds of suggestions with little bit changes to make the domain available for you.
So, you can check it out too in case you want a specific name for your blog.
2.1. Tips to Choose a Perfect Domain Name:
Before finalizing the domain name for your blog, keep these tips in mind,
Choose a domain name ending with .com extension as first priority. If it is not possible, then go for a .net or .org extension. Never choose .xyz or .be extensions as they could seem spammy to search engines like Google and Bing.
Keep the domain name as short as possible. It will make it easier for your audience to remember your domain.
The idea of using numbers and hyphens is not endorsed while deciding on a domain name.
Moreover, it should coincide with the main idea of your blog. For example, if you want to create a blog around “Weight gaining tips”, then the domain name for it should be “weightgainingtips.com” and not “weightlosingtips.com”. Understood my point? Good!
Do not make spelling errors as it will seem quite unprofessional to your audience.
2.2. Buy Domain from a Reliable Service
Right after you lock in on the domain name you want for your blog, buy it from a reliable service.
Here is a suggestion of the websites reliable enough to purchase a domain at affordable prices:
2.2.1. Namecheap
One of the best services to register domain names and hosting services in 2021!
Namecheap offers domain names at reasonable price tags. Apart from that, it frequently gives vouchers and discount codes on different services.
The website accepts multiple payment gateways including PayPal, Bitcoin, American Express, MasterCard, and VISA.
Simply register on the website with your Gmail account, add the domain name to your cart, and purchase it accordingly.
2.2.2. GoDaddy
Another reliable website where you can get the domain you want.
GoDaddy also offers exclusive discounts on its services and its dashboard is quite simple and easy to use.
You can register an account on this website, add a payment method and buy the domain you want easily.
2.2.3. Bluehost
Bluehost primarily offers to host services on its websites. However, you can also register a domain on it at a justified price tag.
Many professional bloggers including the likes of Neil Patel suggest this company as it ensures some extra perks when you purchase its services.
You can register on the website using your Gmail account and analyze different hosting and domain packages available on it to get started with blogging in 2021.
2.3. Choose Web Hosting for your Blog
After you decide on the virtual address of your blog, you now have to select a web hosting package for it.
To make it easier for you, a domain simply means the address of your blog whereas its hosting is where you can build your blog with different means.
You have to purchase some virtual space on the Internet to start building your house (blog content) and this is where you will need web hosting.
For affordable packages, you can see details either on Namecheap, GoDaddy, or Bluehost.
You could also check out the services of Siteground as it offers fast and reliable hosting servers at a justified price tag.
You can get started with a monthly package, but I will suggest registering both your domain and hosting for at least one year to avoid any chaos in near future.
2.4. Connect Your Domain to Hosting
When you finally purchase the domain name and hosting for your blog, the next step will be to connect both of them.
There are many tutorials available on YouTube that will guide you quite well about how to connect a domain name to a host.
If you have bought a domain and hosting from Namecheap, follow this tutorial:
Connect your domain to Bluehost hosting. Here’s the video I have created to help you learn how to create a website:
Subscribe to H-Educate on YouTube
Congratulations!
You have now successfully laid the foundation of your blog and ensured its presence on the internet.
However, the story does not end here!
Now, you have to install a CMS (Content Management System) on your blog in order to start adding content with proper editing and modification.
Follow the next step:
Step 3: Install CMS Now (Blogging Guide)
The next step involves installing a CMS on your blog.
For beginners, I will suggest WordPress as this system ensures content editing and modification on a website even if you do not possess any web development knowledge.
Installing WordPress is easy and it does not require any special skills.
Follow the procedure to install it on your newly created blog:
Open your hosting account and from there access the cPanel login area.
If you do not know the login credentials of cPanel, then simply contact your hosting provider and ask them to give those details.
After you get inside, you will see your domain showing in the dashboard.
In the dashboard, hover down and you will see the “Apps Installer” menu somewhere.
Look carefully and you can see multiple apps available for installation on your website.
From there, simply choose WordPress and click on install.
Follow all instructions along the way and let WordPress get installed on your blog.
Make sure that you have a stable internet connection available before you start installing WordPress on your website.
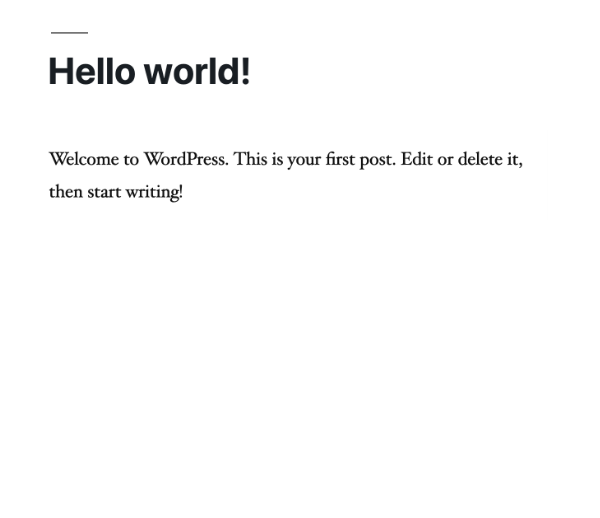
After it gets installed, close cPanel and open New Tab on Google Chrome. Type the address of your website as follows: https://yourdomainname.com/
If it opens like this, then it means you have installed WordPress on your blog perfectly:
You can also follow this tutorial and apply its instructions to install WordPress on your blog properly:
Step 4: Customize Your WordPress Blog
No one would bother reading the content on your blog if it is not properly customized and optimized.
Hence, you will have to make necessary changes to it before you start writing the first post on your blog.
The step-by-step approach to customizing a newly created blog is as follows:
4.1. Installing a Theme
The reason I wanted you to choose WordPress as your CMS is that it offers endless designing themes both free and paid to its users
Our first step after creating the blog would be to install a theme on it.
For that, you will have to access the WordPress dashboard first.
Follow this URL, https://yourdomain.com/wp-admin, and it will open like this:
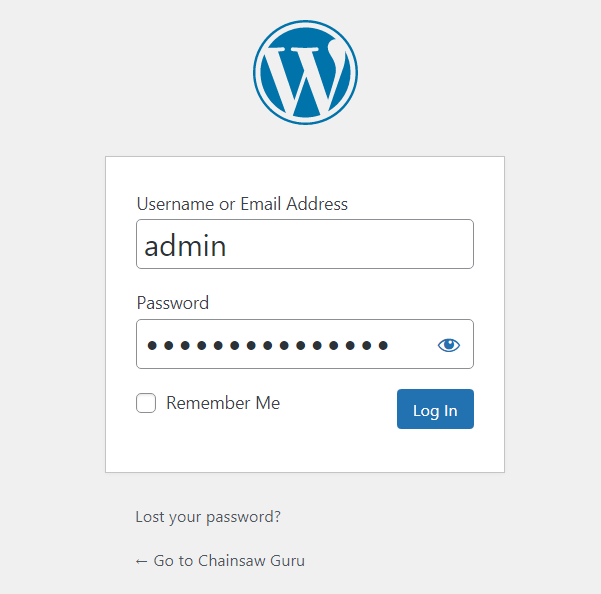
Enter the login details according to the data of your website and press enter. You will see a dashboard like that for your blog:

Hover over the “Appearance” option and then click on “Themes” as mentioned below:
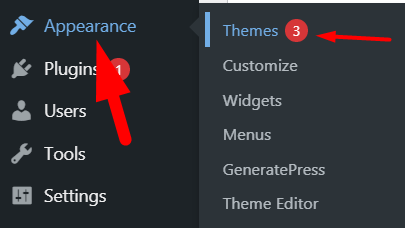
You will see some default themes from WordPress, but we will not use them because they come with limited options.
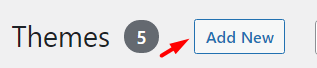
So, simply click on the “Add New” button as follows:
After that, you will see a “Feature Filter” option, where you can filter the type of theme you need.
We will tick the “Blog”, “Custom Header”, and “Grid Layout” boxes in this menu as mentioned below:

Click on Apply Filters and you will see beautiful and eye-catchy themes.
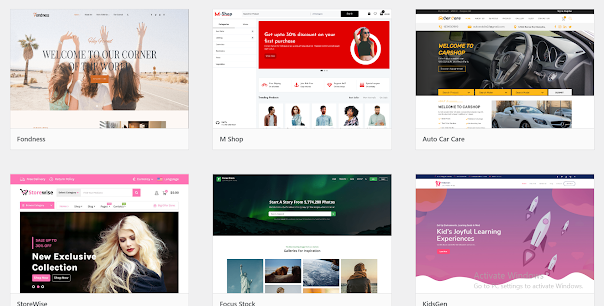
Click on Preview of the theme you want to install and if it looks good enough to you, then simply click on the Install button as follows:
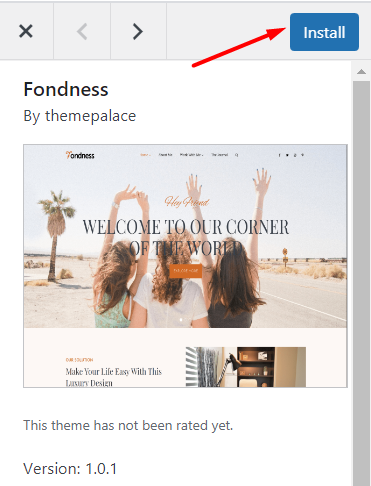
After installation, click on the Activate button that will appear beside the Install button.
Ta-da! You have now successfully installed a free theme for your blog website.
Side Note: If you do not like the layout of free themes, then simply go to these websites and purchase any paid theme you like:
- Themeforest,
- Thrive Themes.
- Elegant Themes, and
- StudioPress.
4.2. Customizing the Theme on Your WordPress Blog
After successful installation, you simply cannot leave your site as it is.
WordPress offers a plethora of customization options that you can utilize to make your site worthy enough.
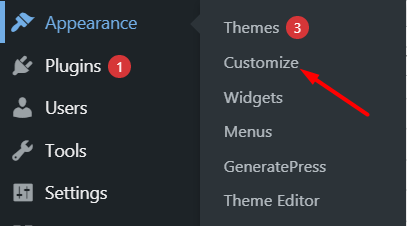
First things first, go back to the Dashboard and hover over the Appearance section. Here you will find Customize option just below the themes, so click on it as follows:
Bear in mind that the Customization Menu will vary from theme to theme. No need to worry about that if your theme does not show certain options.
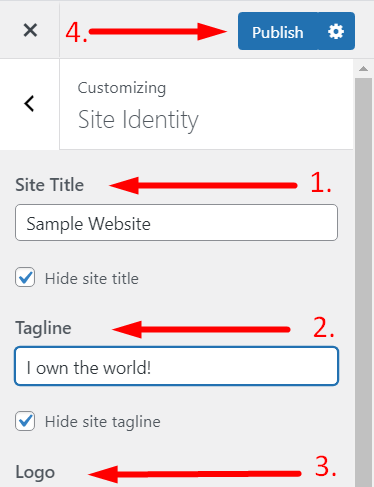
Moving along, the first Menu Option you will see on the Dashboard for most themes is “Site Identity”. Click on it:
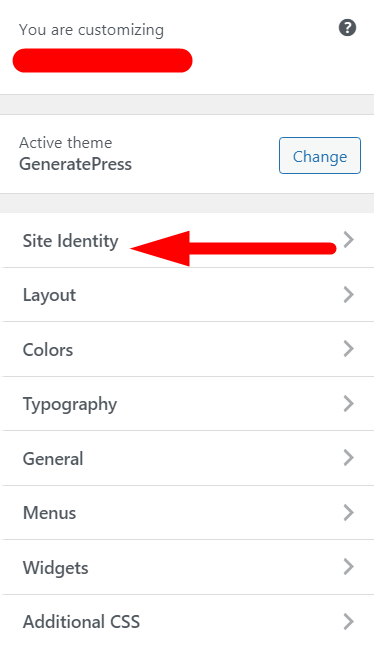
Add Site Title, Tagline, and logo of your blog and click on Publish as demonstrated below:
Next, you can also explore other options such as Layout, Colors, Typography, General, Menus, and Widgets, etc.
Customize the theme but do not exaggerate anything. Keep it simple yet eye-catchy and you will be able to impress your audience easily.
4.3. Installing Plugins on Your Blog
Plugins are the tools that can help you customize your blog with multiple options and features.
WordPress offers many free plugins to its users, so you can install and activate them according to your preferences.
Installing a plugin is as easy as installing a theme on your blog.
Follow these instructions:
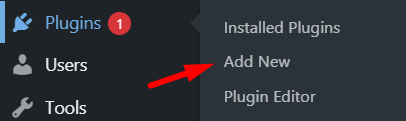
Go to Your WordPress Dashboard and hover over “Plugins”. Click on “Add New” as mentioned below:
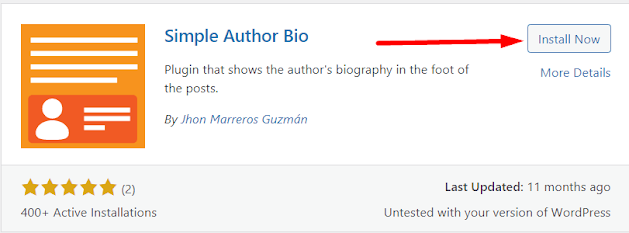
Search the plugin you want to install and press enter.

After finding the exact plugin, click on “Install Now” and let it install accordingly.
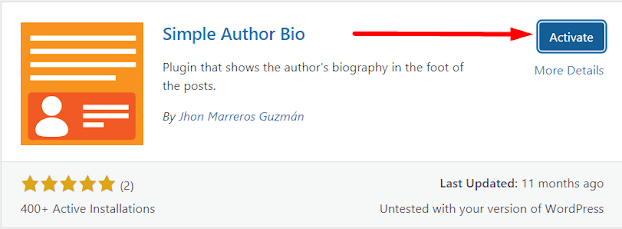
The “Activate” button will appear as soon as you install the plugin, so click on it and you can now utilize that specific plugin according to your needs and requirements.
4.4. Adding “New Post” to Your Blog
After you get done with installing the theme, customizing it, and installing important plugins, now is the time to add your first piece of content to your blog.
Make sure that you have the article ready with proper text, videos, images, and links, etc.
This way, it will be easier for you to just upload it on your blog.
Follow these instructions to add “New Post” on a WordPress website:
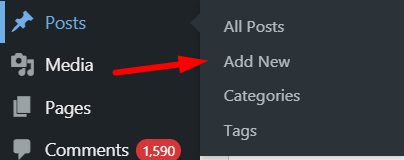
Go to the WordPress Dashboard on your blog and hover over “Posts”. Click on “Add New” as demonstrated below:
I prefer using “Classic Editor” and I will suggest beginners use it while creating a new post on their blog.
Simply install this plugin and activate it. After that, the New Post interface will look like this:
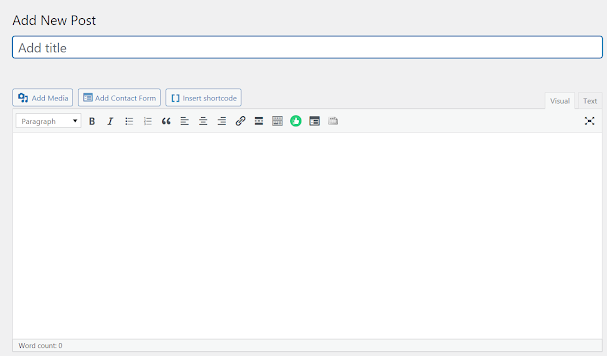
Add a title to your post and paste the text of your article in the body part as mentioned below.

You can utilize the toolbar to make headings. Bold, Italic, and Underline commands could also be used to make your content as attractive as possible.

Use proper images where possible. For that, you can click on “Add Media” and upload image files from your local computer file manager.

After setting up the article properly, click on Preview to see how it is looking and whether it needs any change or not.
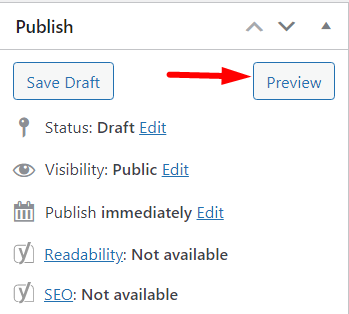
When you think that everything seems okay enough, simply click on Publish button as follows:

Viola! You are now done with creating and publishing your first post on your blog. For ideas, you can get started about your introduction or what you intend to offer to your audience via your blog, etc.
We will discuss how to write a creative blog post further in later sections. For now, you just need to know the basics of adding a new post to your blog post.
Up till now, we have installed a theme, added relevant plugins, and created a new post on a newly created blog.
Now is the time that we optimize it for different search engines (especially Google) to bring some traffic and audience to the website.
So, the next step goes as under:
Step 5: Optimize the Blog for Search Engines (SEO)
Optimizing the blog for search engines will seem complex to you as you are just a beginner.
However, with the right knowledge and information, you could start with proper optimization to let search engines discover your blog for specific key phrases.
Install Yoast SEO (or RankMath)
For that to happen, you will have to install a plugin named “Yoast SEO”.
After installing the plugin, simply activate it, and then go to its settings.
In the Yoast SEO dashboard, you will see multiple tabs. Start with “Your Info” and put all relevant details that the plugin requires.
After that, you will have to verify your website using “Webmaster Tools”, so click on it, and then find the Google Search Console option. Click on it again and you will see a new window popping up asking you to enter your Gmail address.
Add your Gmail account with a password to log in accordingly.
Here you will have to verify your website using different methods. Choose the HTML tag and copy the alphanumeric code to paste it in the Google Search Console section of Yoast SEO.
Save changes in the plugin and then click on Verify from the Google Webmaster Tools section.
After getting verified, you will now have access to the real-time traffic driven to your website and you can analyze it to make your future content strategy accordingly.
Well, open the Yoast SEO plugin again and this time you will have to select the “General” tab.
Click on “Open Installation Wizard” and the plugin will take you to a 10-step installation series.
Each step will ask you to put proper details about the blog, so keep adding them until you are done with the last step of authenticating your website name again.
I know every step sounds extremely complex, but you do not need to worry. It also took me a good amount of time to learn to optimize my website according to Yoast SEO.
You can follow this tutorial from Ferdy Korpershoek to learn optimizing your blog via Yoast SEO
Now, the problem here is, how can you write creative and engaging content for your blog?
As I already said above, if you chose a topic that revolves around your area of interest, you will have no issues writing engaging content for your audience.
Moreover, some tips that you could follow to cover different topics related to your blog are as follows:
Step 6: Brainstorm Topics for Your Blog Based on Keywords
Although it would seem a difficult job as a beginner, you will feel excited enough to brainstorm multiple ideas for your blog.
Make your mind that you are not creating a blog just for the sake of money.
Prioritize your audience first and when the users start getting hooked up with your content, you can monetize your blog using a platform like AdSense.
Keyword Research Tool can be extremely helpful in doing keyword research and brainstorming ideas. It helps you find the right keywords for your site based on the seed keyword. Let’s get to know how it works now.
- Go to Keyword Research Tool
- Enter a seed keyword
- And click on ‘Search’ to find related keywords
The tool also comes up with metrics like monthly volume, paid competition, and CPC for the keywords. Decide on which keywords are perfect for your blog or site. Remember that the magic happens as you search your seed keyword.
A small exercise will not only help you brainstorm blog ideas, but you will be able to write about them perfectly.
Have a look:
6.1. Know What Excites and Intrigues Your Audience
Your audience can leave you a handsome amount of money via your blog, but you will have to make sure that they get whatever information they are looking for.
For instance, if your blog revolves around the soccer team “Real Madrid News”, your readers might get interested in:
Getting knowledge about the latest transfer news about the team.
Knowing more about new signings in the club in recent days.
Looking for the next match against the opponent either in LaLiga or Champions League.
Based on these interests, you can brainstorm multiple topics to engage more audience related to your blog.
6.2. Know the Common Challenges Your Readers Could Face
If you want your blog to become more audience-centric, you must know the challenges they are facing in their daily life routine.
I will yet again give an example of “Real Madrid News” as this topic excites me already.
These days, the fans are facing challenges related to whether a certain player, “Kylian Mbappe” will join Real Madrid or not.
Similarly, many fans could look out for info about the next match and they might look for streaming services to watch it accordingly.
You can easily entice your readers, especially if they find something related to these challenges on your blog.
6.3. Keep Knowledge of What Readers Love about Your Topic
As we talk about Real Madrid news, your readers will love to keep themselves updated with the latest news, match updates, and player ratings.
Moreover, they will also love it if you break rare transfer news to them.
With time, you will get quite experienced in what your readers love about your niche and what they ignore.
Based on it, you can brainstorm different ideas and make your content around it to engage more users.
6.4. Know the Character Traits of Your Readers
For example,
Your readers will have enough knowledge about Real Madrid and they will be looking for something they do not know.
The fans might become reactionary, especially if you do not offer them the news they are looking for.
Moreover, they could become extremely excited when you break the news of the team signing one of the star soccer players.
6.5. Keep Track of What Readers Hate About Your Niche
Real Madrid fans will hate it when you talk about the rival team in a good way or make a post in support of the opposing team.
Similarly, they would also hate it if you do not break certain news to them within a short time.
Based on such experience, you will easily know what your readers actually need from your blog.
6.6. The Final Job
After brainstorming ideas based on what we discussed above, you will get endless topics about your niche.
Some of the prime examples might include:
“Real Madrid Close to Signing Kylian Mbappe from Paris Saint Germain.”
“10 Real Madrid Legends You Must Know About in 2021.”
“Get Insights on Dressing Room Environment Ahead of the Next Match.”
This way, you can use your mind to explore multiple topics related to your area of interest and work on them accordingly.
6.7. Tips to Write Engaging Content
After finding different topics related to your niche, you will have to write content on them, which is not as easy as it looks.
Some of the tips that might help you in this regard include:
Speaking in a Conversational Tone: It will help keep your readers engaged enough and they will read your blog post till the end. So, speak in a tone that they understand easily.
Maintain a Natural Flow of the Content: Keep coherence in mind while you write the content. Maintaining a natural flow will make it easier for your readers to understand the information you are conveying.
Use Headings and Subheadings: Break down your content into small chunks and use as many headings and subheadings where necessary. It will make a good impression on your readers and they will not get bored easily.
Make Lists and Bullet Points Where Possible: People love conciseness and bullet points provide just that. You can also make lists comparing different things to keep your user as engaged as possible.
Check Your Content for Spelling and Grammatical Mistakes: Content with little or no spelling or grammatical mistakes will not frustrate your readers. I will suggest using an online tool, i.e. Grammarly to double-check whatever you have written.
6.8. To Conclude
After getting done with brainstorming ideas, writing content, and finding images related to it, you can post it on your blog by following the steps I have mentioned in “4.4. Adding “New Post” to Your Blog” section.
Step 7: Create Editorial Calendar for Your Blog
I have seen many bloggers making the mistake of not following a proper schedule after they publish their first post on the blog.
Well, you simply cannot let that happen.
If you do, you will not only lose potential readers, but different search engines including Google will throw you on the 2nd page.
As much as your readers love updated content on your blog, search engines like Google also value updating content on a regular basis.
For that purpose, you need to create an editorial calendar for your blog.
Scheduling different activities for your blog will not only enhance your productivity, but you will also become quite punctual.
This will help you post hundreds of articles revolving around different topics within a short time.
You can either use a third-party calendar to create a proper schedule or you can utilize the services of inbuilt Google Calendar.
Add all relevant data and set it according to different dates. Follow the schedule properly and you will surely enhance your chances of getting ranked on Google within a short time.
Step 8: Boost Your Blog Traffic with Social Media
Many bloggers I see only rely on SEO to boost the organic traffic on their blogs.
However, social media is quite dominant, especially in the 21st century.
With the right strategy, you can drive thousands of readers to your blogs and even make them your avid subscribers.
Some of the platforms you could utilize for that purpose include:
8.1. Blast on Facebook:
Make a Facebook page about your blog and start promoting it through free and paid promotions.
Keep posting useful information related to your blog and once you get sufficient followers, start driving them to your blog indirectly.
You can post links to different blog posts and ask your audience to click them for more valuable information.
8.2. Rock on YouTube:
Blogging and vlogging can go side by side and leave you with many potential readers and subscribers.
You can make a YouTube channel and start creating content relevant to your blog to add useful subscribers and viewers easily. I also do the same thing by repurposing my YouTube videos for the H-Educate blog.
After that, you can refer them to your blog and boost your traffic accordingly. And It’s not just about traffic, people also click on your affiliate links shared in your videos’ descriptions.
8.3. Outshine on Instagram:
Instagram works like a charm for bloggers and could end up giving you thousands of subscribers and avid readers.
You can make a professional Instagram account and keep posting on it until you attain a good amount of followers.
Simply use your Instagram bio and stories to divert the users to your blog and enjoy extra traffic. Also, benefit from hashtags on the platform. Here’s how to find them for your blog.
- Go to Instagram Hashtag Generator
- Type in your seed keyword
- And click on ‘Generate’ now
That is all about different blogging strategies that will get traffic within a short time.
The main reason you are doing all that is to make your blog capable of earning money through AdSense.
Let us now get started with our next important section, i.e., “How to earn money with Google AdSense in 2021.”
Ultimate Blogging Guide: How to Make Money With AdSense
You must have experienced multiple ads on a specific website while you are reading its content, right?
Ever wondered how these ads appear on a website?
They appear because the blog owners of such websites are using multiple ad platforms.
Google AdSense is one of the platforms that you can use to earn a good amount of money from your blog.
But, what it actually is and how it works are some of the questions we will cover before getting started with earning money from AdSense.
Here’s the catch:
1. What is Google AdSense?
Google AdSense is a Google-owned Ad platform that allows running ads on the blog.
Once a user clicks on a specific ad from Google AdSense, the site owner gets paid according to the rules and regulations set by the Google AdSense team.
Talking in a similar context, this platform was launched back in March 2003. However, it got the real name, i.e. “Google AdSense” in 2013.
2. How does Google AdSense Work?
The working interface of AdSense is extremely easy and that is the main reason many blog owners prefer it compared to other ad networks.
After your website gets approved to show Google Ads live, you will receive specific codes that you will have to add using a plugin.
After some time, your blog will start showing different ads based on the context of the article a reader is reading.
Whenever a user clicks an ad, it will get counted in your AdSense account and you will get paid according to the number of clicks you get per month.
3. Why Use Google AdSense for Your Blog in 2021?
One of the reasons blog owners prefer this network compared to other ones is that it pays off really well especially if you are getting traffic from countries like the United States or the United Kingdom.
Moreover, people trust the brand “Google” and they know their money is safe and secure. Plus, they will get paid at the mentioned time and date and that is why they prefer using Google AdSense.
Some other reasons include:
Easy to Use:
Once you get approved, you simply have to copy and paste the codes given to you on your blog.
You could then automate the whole process using AdSense tools and enjoy easy money.
Highly Recognized Network:
AdSense, in fact, is one of the most popular and highly recognized ad networks available in 2021.
Advertisers pay a good amount of money to Google to let their ads run on multiple platforms.
In return, Google ensures high CPC and RPM rates to its publishers, which could skyrocket their earnings easily.
One Account for All Sites
The best thing about this platform is that once you get an approved account from only one website, you can use the same account for as many sites as you want.
Just make sure that you follow Google AdSense policies and guidelines to remain on the safe side.
Step By Step Guide to Start Earning Money from Adsense
This guide is for you if you are a beginner and want to make money with Google AdSense.
It includes all relevant information about creating a Google Adsense account, getting it approved, and then earning money from it.
Follow it if you want your blog to convert into a money-milking machine. Let’s get started.
Step 1: Create a Google AdSense Account
Creating a Google AdSense account is as easy as creating a Gmail account.
Go to https://www.google.com/adsense/start/ and click on “Get Started”. Put your primary Gmail account’s credentials and press enter.
Google AdSense will then ask for your website and the country you are living in, so fill all the boxes carefully.
Tick the Agreement box from the platform and then click Start Using Adsense.
That’s it!
You can now use the Google AdSense dashboard to connect your website to it.
Step 2: Connect Your Site to AdSense
After you click on Connect Your Site to AdSense, a new window will open where you will see a default HTML code.
The website will ask you to copy and paste it into the HTML of your website.
After successfully passing the code on your website, click on Request Review and Google will start analyzing your website to see whether it fulfills its policies and guidelines or not.
Step 3: Wait for Google’s Official Answer
Google will inform you via email and give a verdict on whether your website is ready to show ads or not. It will take at least 24 to 48 hours and in some cases a week as well.
If you receive a Congratulations method, then you simply have to copy and paste the ads given to you on your website.
However, if you receive a rejection email from AdSense, then there is no need to panic.
Follow these tips to get your AdSense account approved easily:
Step 4: Prepare Your Website for Google AdSense
There are a few things I would like you to consider before even applying for AdSense. Let me share a few more tips in this video:
Make Your Website Responsive:
Google hates websites that load slower and it could become a crucial point for your AdSense approval.
To avoid this problem, make sure that you use a lightweight and properly optimized theme on your blog.
Next, you have to ensure keeping a visible text size, properly optimized images, and other content on your blog.
Finally, host your blog on a responsive server so that it can load quickly.
Cover Your Niche Properly
Google is never going to accept your AdSense account with only a bunch of posts.
As I already mentioned above, Google loves the quantity and quality of the content.
So, cover every aspect of your niche and post at least 20 to 30 articles before you apply again for the ad network.
Do Not Use Plagiarized Content
Blog owners who use plagiarized or spun content on their blogs will never get approved no matter how hard they try.
Avoid using plagiarism at all costs while creating content for your blog.
You can outsource the content writing task if you cannot write on your own.
Make Necessary Pages
Google wants your blog to become as authentic as possible.
To comply with its policies, you need to create several pages including:
- Privacy Policy Page
- About Us Page and
- Contact Us page.
It will make your blog not only trustworthy, but you will also increase your chances of getting approved for the platform.
Never Apply Unless You are Getting Some Traffic
Finally, before you apply for the Google AdSense program, make sure that your blog is receiving at least 50 to 100 users a day.
When Google sees traffic on your website, it will consider your application to help advertisers publish their ads on your blog.
Follow all these guidelines and I am sure you will get the Congratulations message on your email address soon enough.
Step 5: Start Earning Money through AdSense
After pasting codes on your website, you can track the number of clicks, CTR percentage, and RPM on your Google AdSense account.
Test different ad layouts on different pages and see which ones perform better to increase your revenue.
One thing more, Google will share 68% of the total revenue it receives from your blog and will keep 32% to itself.
That means, if you manage to earn $1000 per month, you will get paid $680 and Google will keep the rest, i.e. $320.
Summarizing the Definitive AdSense Blogging Guide
In order to earn money from Google AdSense, you must at least have a blog that is receiving some traffic.
To create a blog, you must need a domain name, a hosting service, and a CMS (WordPress).
After customizing your blog, you can start covering your niche from different angles and entertain your readers in the best possible way.
Apply for Google AdSense after you make your blog stable enough and start earning easy money while keeping track of different metrics using AdSense’s dashboard.
That is all from my side. Follow all the guidelines I have mentioned thoroughly about blog and Google AdSense account creation and I am sure you will thank me later after earning a good amount of money in 2022.
Also, See:


Works Cited
H-supertools. “H-Supertools: Free SEO and Digital Marketing Tools.” H-Supertools - Ultimate Blogging Guide, h-supertools.com, 5 Feb. 2022, https://h-supertools.com/guides/blogging-guide.
hello
ReplyDeleteGreat article. Please share a link with https://cjmall.org
ReplyDelete